

How To Use Qemu On Windows
Qemu is open-source software for virtualization on Windows 10/8/7, Linux, and macOS but with a command-line interface, lightweight, and low hardware requirements.
QEMU stands for "Quick Emulator" and is the standard tool for virtualization and CPU emulation under Linux, Windows, and macOS. On Linux systems, QEMU uses the functions of the Linux kernel for virtualization (KVM- Kernel Virtual Machine), which are not available under Windows.
Thus, the binaries of Qemu'due south ported version for Windows past Stefan Weil couldn't provide the operation as it gives on Linux OS with KVM. Thus VirtualBox or Vmware player volition be the best culling options; still, if you want to try then here in this Qemu tutorial, we will let know the mode to download, install and utilize Qemu on Windows 10 or 7 using its GUI VM director Qtemu, an open-source software.
Qemu installation on Windows x with Qtemu GUI
Footstep 1: Download Qemu for Windows
From the official website of the Qemu, nosotros can download it easily even the source code. Visit it and click on the Windows tab, it volition take you to another page https://qemu.weilnetz.de to download 32 bit or 64 bit of this virtualization platform. Here we are getting the 64 bit.
Step 2: Install Qemu
At present, like whatever other Windows 10/7 software, just double click on the downloaded setup of Qemu and follow the installation wizard.
- Take the suggested linguistic communication setting, by default information technology will be English. Select the "OK" push.
- Press the Side by side button.
- Confirm the usual license terms (GNU General Public License) with "Accept".
- All modules required for QEMU have already been selected in the "Select components" dialogue. Confirm with "Next".
- Cheque the suggested destination folder and become to "Install".
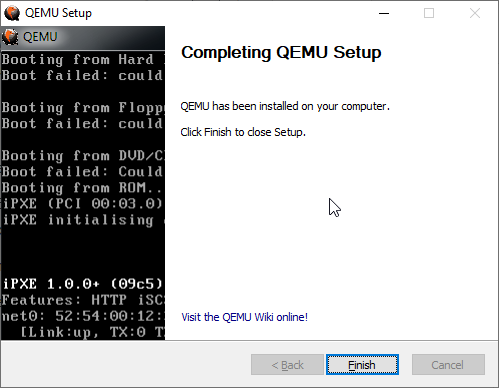
- Click on "Finish" to complete the setup of QEMU.
Qemu install & setup on windows
Step three: Install GUI for QEMU on Windows 10
As we know the QEMU uses the control line to create virtual machines by default. Merely it would be not feasible for standard computer users using CLI to manage virtual machines, thus we install another open-source application to provide a Graphical user interface (GUI) to QEMU. This program is known equally Qtemu which is a fork of a dead project available at https://qtemu.org.
Here are the links to download an active Qtemu project for Windows 10/8/7 available on Gitlab.
Windows x86_64 installer
If you don't desire to install information technology, go for the portable version.
Windows x86_64 portable
Gitlab Page Link of the project.
Step 4: Setup QEMU manager Qtemu GUI
After the installation of Qtemu run it from the Windows Kickoff carte.
- In the first column "QEMU binaries path" re-create-paste this: C:\Program Files\qemu\ Or enter the path where you accept installed the QEMU.
- For the second column enter the path of the Qemu-img file that is: C:\Program Files\qemu\qemu-img.exe
- Now create a folder anywhere on your computer where you desire to salve the virtual machines created by QEMU. And click on the folder icon given in the front of the third cavalcade to select that detail folder.
Note: You tin change this configuration whatever time from the Qtemu Settings.

QTEMU GUI for QEMU on Windows 10 configuration
Later that click on the Terminate push.
Stride 5: Create a Virtual machine
At present, from Qemu GUI manager Qtemu, simply click on Car and select New Auto.
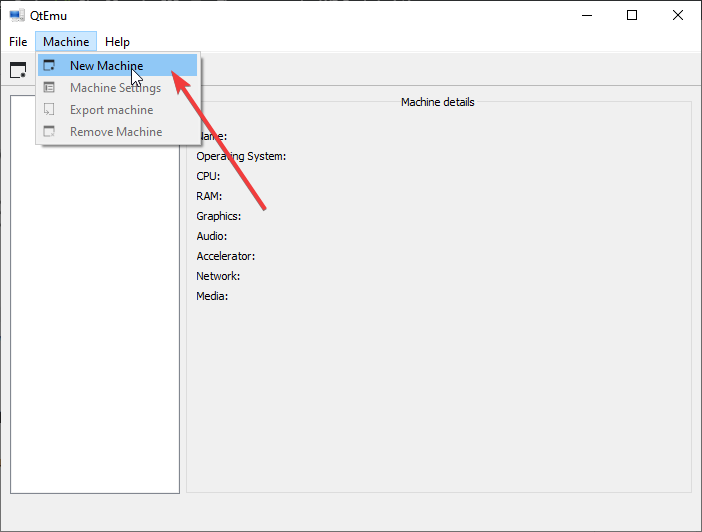
Create a New Virtual machine
Leave the Machine which is meant to select some item motherboard chipset.
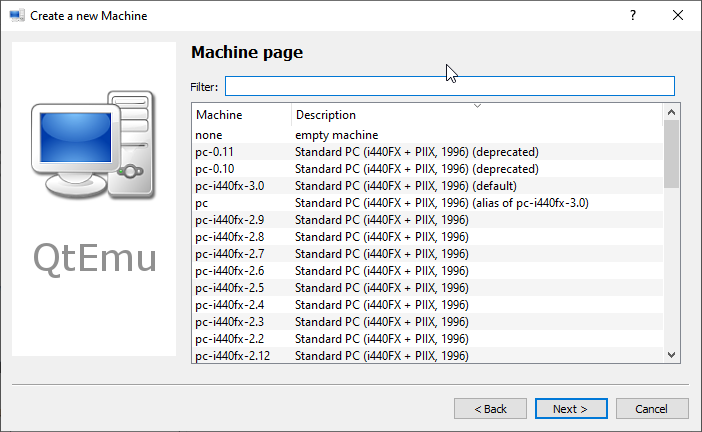
QTEMU Machine folio
Configure the Virtual Machine hardware, select the CPU type such as Core 2 Duo, Base, or any CPU that Qemu would be able to emulate on your organization whereas setting the CPU count, cores, Thread every bit shown below screenshot.
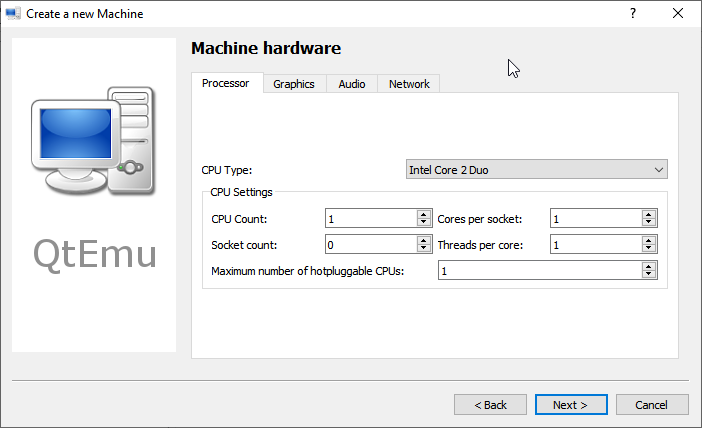
Set CPU in QTemu
Past Default, the HAXM- Hardware Accelerated Execution volition be selected in the Qtemu simply in case the HAXM is non supported by your system or not available, thus uncheck it and check TCG- Tiny Code Generator.
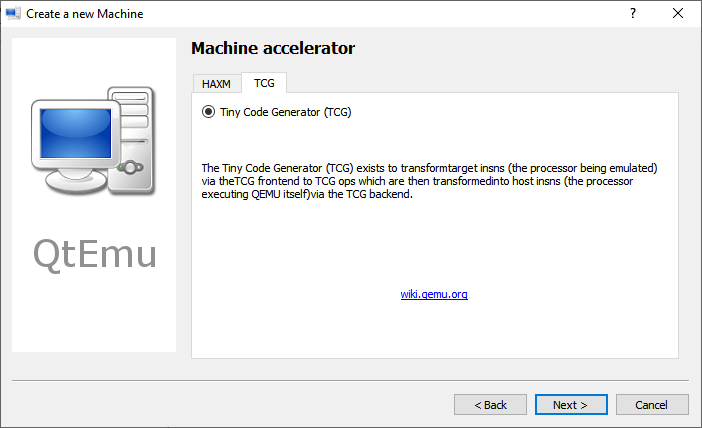
Accelerator Tiny code generator
Ready the corporeality of RAM you want to assign to your VM.
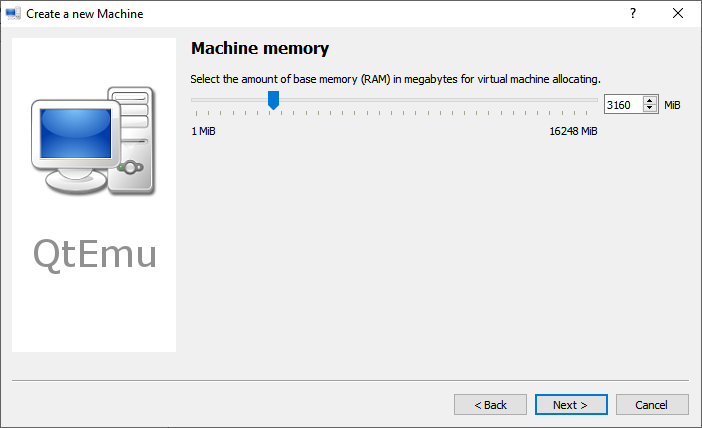
Set Qemu GUI RAM Retentivity
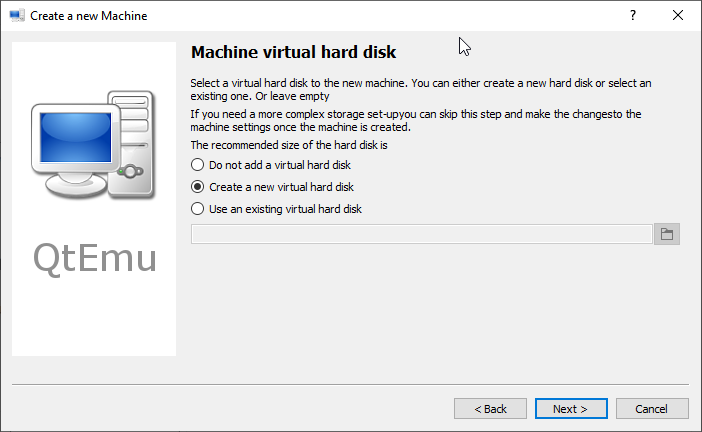
Create a new difficult disk on Qemu

Gear up Qemu difficult disk
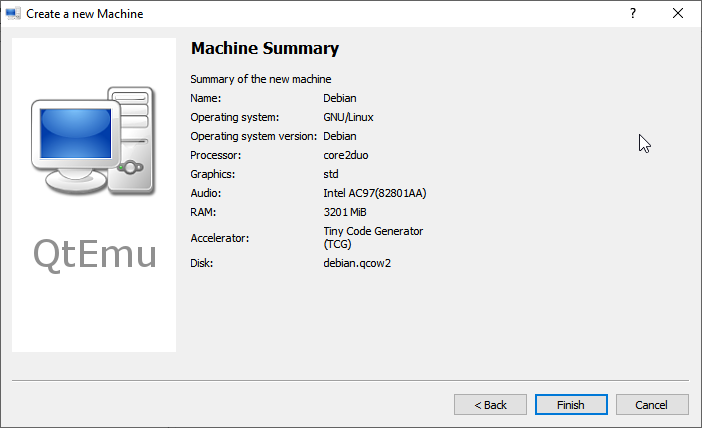
Auto Summary
Step 6: Set bootable medium CD/DVD
Now, everything is ready, nosotros have created a Virtual machine, its time to prepare a bootable medium to CD; and then that our ISO file could exist used while booting the QEMU VM.
For that correct-click on the created VM on the QTEMU interface and select Auto Settings.
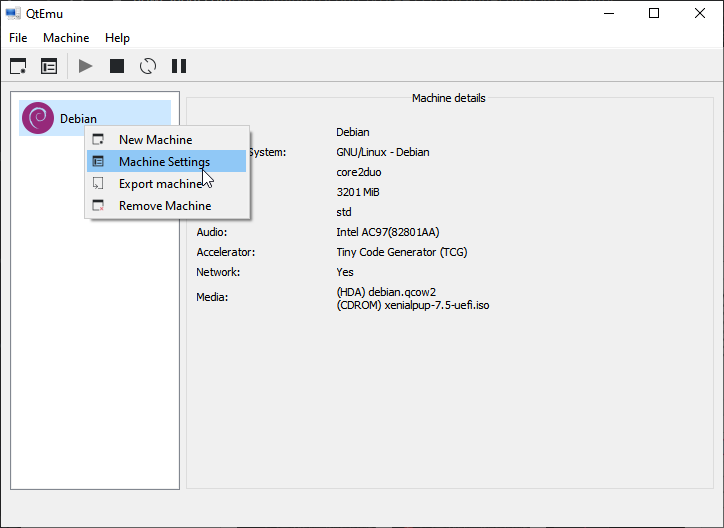
VM car Settings
There select the Kicking options from the right-side panel and later that check the "Enable kicking menu" and so the CD ROM option following the Save button.
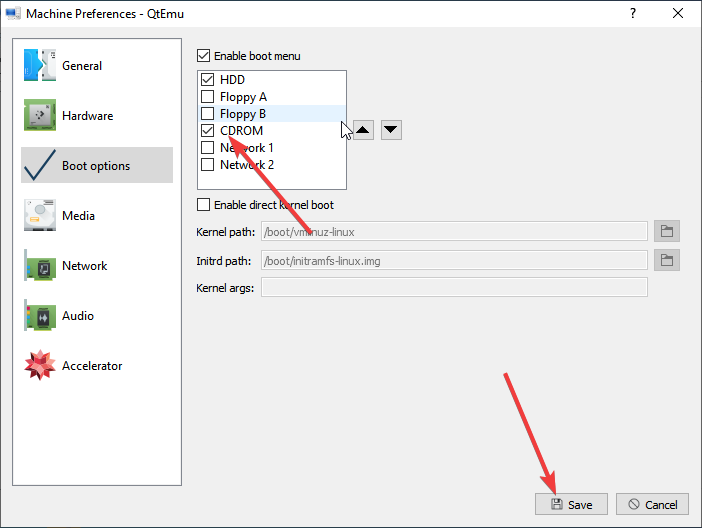
Set bootable medium in Qtemu
Pace 7: Insert ISO file in QEMU via Qtemu GUI
Under the Machine settings, go to the Media menu and click on the CD icon. This will open the Windows file explorer, navigate to the ISO file of the OS with which you want to kicking in QEMU, and click on the Save button.

Select ISO file as a bootable medium
Step eight: Boot Qemu Virtual Machine via GUI
Now, on the main interface of the Qtemu GUI, select the created VM and click on the start button. This will open the boot screen.
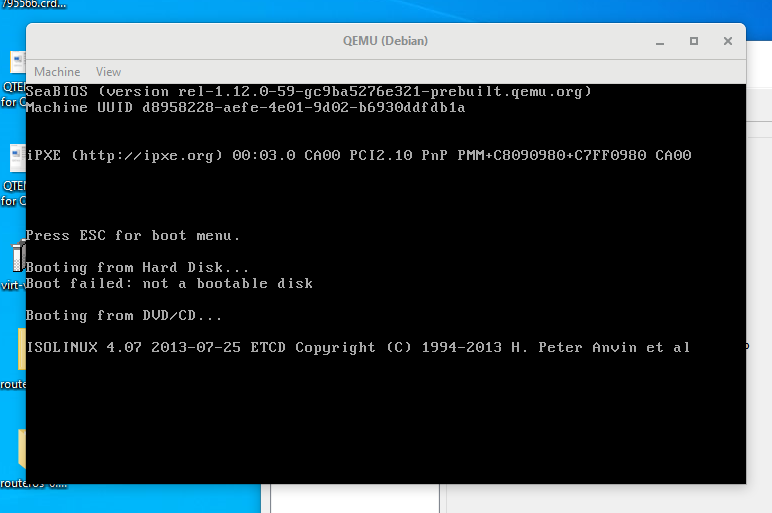
Boot QEMU virtual auto
Wait for a few minutes depending upon the Os distribution you are using, it volition show the LIVE screen of the same. Notwithstanding, I tried to boot and install Windows 10 on Qemu using the GUI only information technology was quite sluggish and slow.
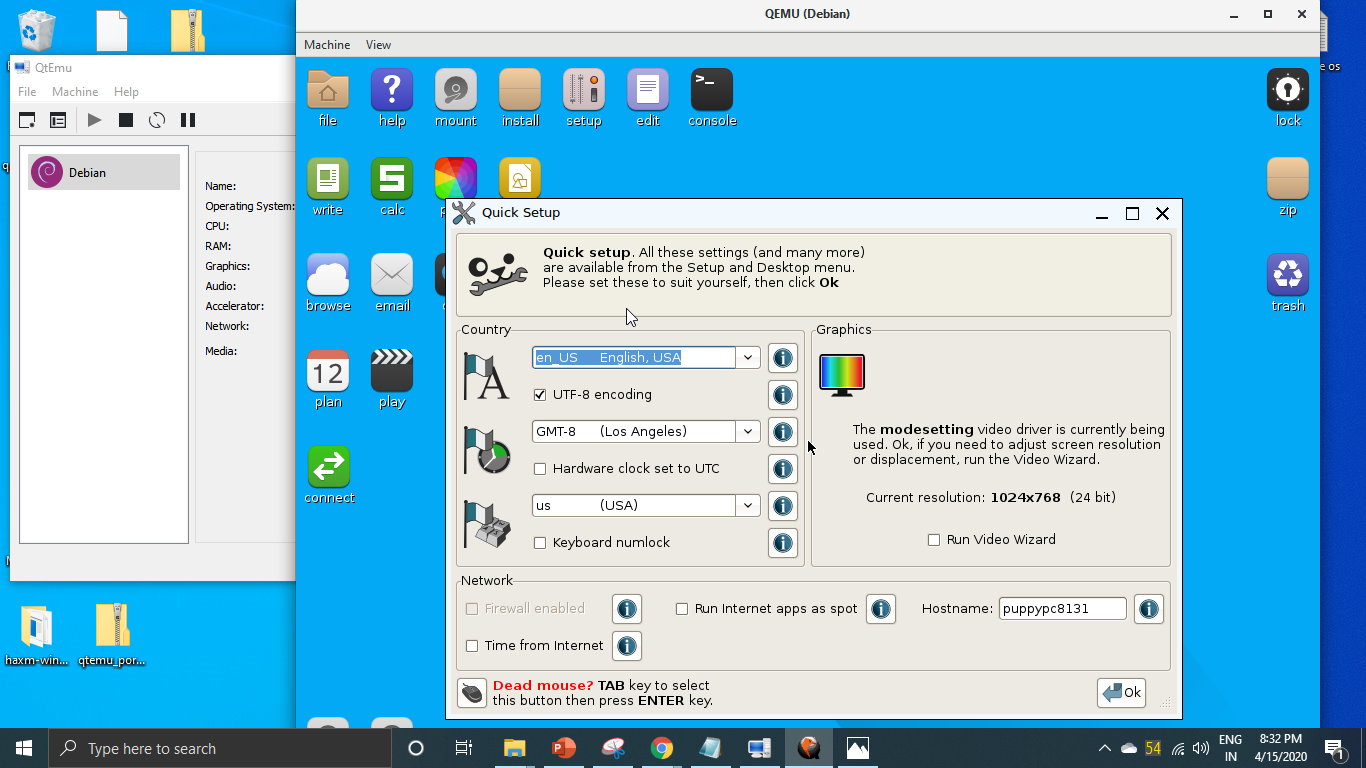
Qemu installation on Windows 10 with Qtemu GUI
Verdict:
Although the CLI tin exist used to create and manage a Virtual motorcar on Windows 10 using the QEMU, with the Qtemu GUI tool it becomes quite like shooting fish in a barrel, however, in my case it worked well with Lightweight Linux Distros simply for Windows invitee VMs quite deadening and low performance. I recommend using VirtualBox instead. Even so, if someone wants to experience Qemu on Windows x this is the easiest possible mode. Still, exist cautious with Qtemu hardware configuration because slight here and there will not let y'all kick the VM.

How To Use Qemu On Windows,
Source: https://www.how2shout.com/how-to/how-to-set-up-virtual-machines-with-qemu-gui-on-windows-10.html
Posted by: cabreraaltatter.blogspot.com
0 Response to "How To Use Qemu On Windows"
Post a Comment